Pages

Showing posts with label school age. Show all posts

July 21, 2015

Melted bead wind chime


what you need
• beads
• muffin tin
• coil closures for bracelets or necklaces
• Clear string. We used bead n stretch
• nail polish or crazy glue to secure the knots
• and either nail clippers or wire cutters to cut off the excess coil after your beads are done melting.
• you're also going to need something to tie your finished melted beads to. We had an old winter time that I took part and just put back together with our new parts. You might be able to use a coke can or one of the wooden rings from needlepoint. Get creative.
What to do
1. First you can align the bottom of your muffin tin pan with the single layer of beads
2. Then you're going to add one of those little coils near the top but not too close to the top
3. Once you have all tins filled put them in the oven at 400 degrees leave in for 25 to 30 minutes 


4. Take out and let cool hang out and let cool the plastics released from the bottom of the pan on its own.
5. Once cool remove and cut off the excess coils. 


6. Assemble your wind chime reinforce your knots with crazy glue or nail polish.


November 7, 2014

DIY Moon Sand ( 2 ingredient)


You need:

  • 4 cups flour
  • 1/2 cup baby oil
  • container (we used the lid off a sheet cake) 

Directions:

  1. Add flour to your container
  2. Drizzle oil evenly over flour.
  3. Knead the oil into the flour with your hands until the all the flour is completely coated

Our Experience:

Why haven't i done this sooner it was so fun. I love playing in sand and so do the littles. It was super quick the throw together and super fun. Haven enjoyed it lots also hahaha. It was pretty messy though. We were covered in white when we were finished. I wouldn't do it in a carpeted area or near upholstery because even tho the flour can be easily vacuumed the oil might stain. 


November 4, 2014

Toilet Paper Roll Monsters


You Need:

  • Toilet paper rolls
  • Tempera paint
  • Pipe cleaners
  • Googly eyes
  • Tissue paper
  • School glue 
  • Shish kabob skewer (or something similar to make holes in the toilet paper rolls)

Directions:

  1. Paint the toilet paper rolls and let them dry. 
  2. Take the skewer and poke two holes on each side of the Toilet paper roll.
  3. Put the pipe cleaner in a hole and feed it though the second hole.
  4. Make loops at each end of the pipe cleaner and twist to make hands.
  5. Glue on the number of eyes you want.
  6. Bunch up tissue paper and put into the top of the toilet paper roll to make hair.
  7. Add a little glue inside the role to fasten the tissues paper to the toilet paper roll.

Our Experience:

This was easy and fun. After we made them we plays monsters together. Roar, roar. It was a good time, even tho the eyes kept falling off. Haydynn was a little smarty and was the only one to paint eyes on hers under the googly eyes.


October 30, 2014

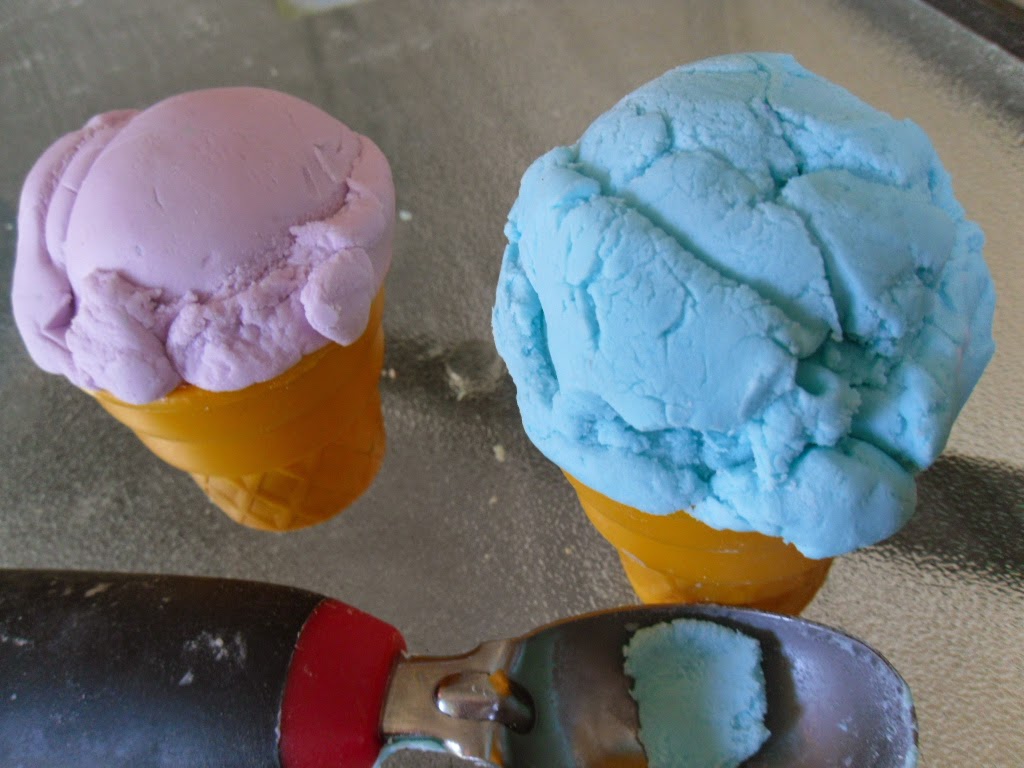
Ice Cream Playdough


 I originally found the recipe for Ice playdough at Smart School House. There they have the exact recipe of how to make it but i left winged it. I'm going to tell you how i did it.

You need:

  • Frosting
  • Powered sugar
  • Food coloring 
  • Mixing bowl

Directions: 

  1. Put Frosting in to mixing bowl
  2. Add food color
  3. Stir
  4. Add about a cup of powdered sugar
  5. mix. Its going to start getting thick.
  6. Add more sugar into the dough and knead it in. In the original recipe she used a mixer with a dough hook attachment but i don't have that so i used my hands. 
  7. You'll want to add powdered sugar until the dough is soft but not sticky.  You'll use about 2 3/4 cups of sugar for a cup of frosting. I didn't measure because was to much works, so i just eye balled it.
  8. Add a drizzle of oil if you added to much sugar or it begins to dry out  


Storage:

Store in a Ziploc bag in the refrigerator . Take out 30 mins before used to soften the dough before play.

Our Experience: 

Haven loved it! he like making ice cream out off it and just simply squishing it with his hands molding it and having fun with it.


For me though it was very messy. Maybe if it wasn't sugar i wouldn't of had a problem with the mess but we have ants. All I could think about was if i didn't clean this really well the ants would be every where and I'm out of Raid. It dried out pretty quickly and flaked of a lot. 
It  was fun and i do think its something you have to try at least once with your littles. I mean come on is playdough made out of frosting, that is kids two favorite things combined.


October 17, 2014

Glow Jar On A Cold And Gloomy Day


You need:

  • Glow sticks (we used the bracelet ones but i think the thicker ones might be easier to pour
  • Scissors
  • A mason jar
  • Glitter 

Directions:

  1. Crack the glow sticks to make glow
  2. Cut end off over jar and pour it in. ( If you use the thin ones like us, cut both ends and blow out the sticks contents in the jar. Try not to get it in your month it tastes so bad but its non-toxic if you do.
  3. Add a pinch of glitter
  4. Put the lid on tightly
  5. SHAKE

Our Experience:

Glow stick guts splatted everywhere when i cut of the tips . First we tried to make cool glow effects in water with last Halloweens glow sticks. So much fail happened with that. We went in to the kids room to get some darkness and we sat on the floor and i started cutting. The carpet the sheets and us began to glow. Then just like any 2 year old would Haven wanted to put the glow stick in his mouth. Eww, so he started spitting every where.  To top it off the glow sticks didn't even glow that brightly because they were so old. It happens though projects fail. On the flip side I started painting on the baking pan with the grow sticks and it made pretty neat effects. I want to try this with Haydynn (6 Year Old) , outside at night some time.


 Back to the glow jar:


 I took the assembly of the jar to the kitchen. i should have went outside tho because now i have to rewash some dishes that got splattered. I let Havok pull up a chair and watch but i took over this one. Once i new what i was doing putting it all together to a matter of minutes.  It looks really neat. Just have to watch him with it because it is a glass jar. Its a cool thing to cuddle under a blanket on a cold gloomy day.


ATTENTION: Glow sticks have glass in them and the chemicals can burn eyes or mouth or throat if ingested. HANDLE WITH CARE. leave the handling part for the parents. 

October 15, 2014

Homemade Playdough


You'll need:


  • 1 cup water
  • 1 Tbsp vegetable oil
  • 1/2 cup salt
  • 1 Tbsp cream of tarter
  • food coloring
  • 1 cup flour 
  • saucepan

Directions:

  1. add: water, oil, cream of tartar & food coloring in saucepan. Heat until warm.
  2. remove from heat, then add flour.
  3. knead dough until smooth. 
  4. *Optional: we kneaded in a little glitter after the dough was formed, just because.

Storage:

Store dough in a air tight container or Ziploc freezer bag. The cream of tartar makes the dough last six months or longer so don't leave it out.

October 2, 2014

Simple Things I Did to Make a Week Day Birthday Special.

Haydynns birthday landed right in the middle of the week this year, and although we will be celebrating this weekend with a party and all the family, her BIRTH DAY is still special. So this is what we did for her to make her day special as she is. 

When we woke up for school I traded my coffee time to make her look extra special. So worth it she was beaming from ear to ear.
I made little goodie bags, with bulk candy. Easy enough.... 


Well kinda. Haven kept swiping the candies.


Then finally when he gave up our little kitty Dexter decided thought it be fun to try to steal whole bags.


This i where normally i would bag them up and place them in her back to deliver to her teacher as soon as she got to school, But we got lucky this year and grandma bought cupcakes and we got to visit her class room after lunch. It was so nice.


Then later at dinner time i made her the exact dinner she requested the night before, no questions asked. It was very yummy.


And of course in true birthday fashion there was cake. It was homemade and very homemade looking but that didn't matter because she loved it. We sung and then enjoyed this delicious cake. It was a absolute great day. She felt as special as can be which is very important to a little girl with two little brothers so close in age.