Pages

Showing posts with label fun. Show all posts

July 21, 2015

Melted bead wind chime


what you need
• beads
• muffin tin
• coil closures for bracelets or necklaces
• Clear string. We used bead n stretch
• nail polish or crazy glue to secure the knots
• and either nail clippers or wire cutters to cut off the excess coil after your beads are done melting.
• you're also going to need something to tie your finished melted beads to. We had an old winter time that I took part and just put back together with our new parts. You might be able to use a coke can or one of the wooden rings from needlepoint. Get creative.
What to do
1. First you can align the bottom of your muffin tin pan with the single layer of beads
2. Then you're going to add one of those little coils near the top but not too close to the top
3. Once you have all tins filled put them in the oven at 400 degrees leave in for 25 to 30 minutes 


4. Take out and let cool hang out and let cool the plastics released from the bottom of the pan on its own.
5. Once cool remove and cut off the excess coils. 


6. Assemble your wind chime reinforce your knots with crazy glue or nail polish.


June 2, 2015

Dollar Ben Bargains - Building Blocks


Our Experience: 

I feel that all the best crafts and activities for toddlers come from the dollar section. After all the rip, break and lose soo much. Today we are busting out the dollar building blocks. 

We have not ourselves invested in Legos as of yet simply because the cost a pretty penny and my toddlers would lose them. We love the idea of Legos so when I spotted these at the bottom of a Target dollar section I had to have them.
The kids are definitely enjoying these blocks. I say money well spent.

Always take time to scan the dollar section anytime you're there you never know what neat things you'll come across.


November 4, 2014

Toilet Paper Roll Monsters


You Need:

  • Toilet paper rolls
  • Tempera paint
  • Pipe cleaners
  • Googly eyes
  • Tissue paper
  • School glue 
  • Shish kabob skewer (or something similar to make holes in the toilet paper rolls)

Directions:

  1. Paint the toilet paper rolls and let them dry. 
  2. Take the skewer and poke two holes on each side of the Toilet paper roll.
  3. Put the pipe cleaner in a hole and feed it though the second hole.
  4. Make loops at each end of the pipe cleaner and twist to make hands.
  5. Glue on the number of eyes you want.
  6. Bunch up tissue paper and put into the top of the toilet paper roll to make hair.
  7. Add a little glue inside the role to fasten the tissues paper to the toilet paper roll.

Our Experience:

This was easy and fun. After we made them we plays monsters together. Roar, roar. It was a good time, even tho the eyes kept falling off. Haydynn was a little smarty and was the only one to paint eyes on hers under the googly eyes.


October 30, 2014

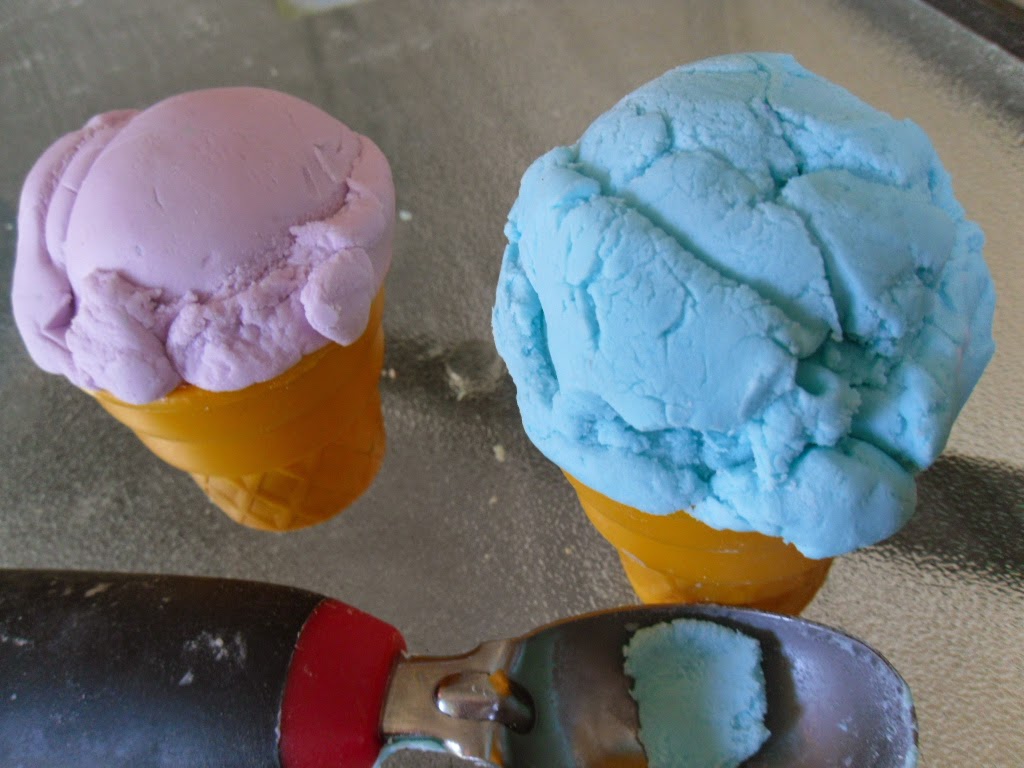
Ice Cream Playdough


 I originally found the recipe for Ice playdough at Smart School House. There they have the exact recipe of how to make it but i left winged it. I'm going to tell you how i did it.

You need:

  • Frosting
  • Powered sugar
  • Food coloring 
  • Mixing bowl

Directions: 

  1. Put Frosting in to mixing bowl
  2. Add food color
  3. Stir
  4. Add about a cup of powdered sugar
  5. mix. Its going to start getting thick.
  6. Add more sugar into the dough and knead it in. In the original recipe she used a mixer with a dough hook attachment but i don't have that so i used my hands. 
  7. You'll want to add powdered sugar until the dough is soft but not sticky.  You'll use about 2 3/4 cups of sugar for a cup of frosting. I didn't measure because was to much works, so i just eye balled it.
  8. Add a drizzle of oil if you added to much sugar or it begins to dry out  


Storage:

Store in a Ziploc bag in the refrigerator . Take out 30 mins before used to soften the dough before play.

Our Experience: 

Haven loved it! he like making ice cream out off it and just simply squishing it with his hands molding it and having fun with it.


For me though it was very messy. Maybe if it wasn't sugar i wouldn't of had a problem with the mess but we have ants. All I could think about was if i didn't clean this really well the ants would be every where and I'm out of Raid. It dried out pretty quickly and flaked of a lot. 
It  was fun and i do think its something you have to try at least once with your littles. I mean come on is playdough made out of frosting, that is kids two favorite things combined.


October 16, 2014

Halloween Slime

What you need:


  • 4 oz white school glue
  • 1 tsp borax
  • 1 cup water
  • 1/2 cup water
  • two bowls
  • food color
  • googly eyes

Directions:

  1. mix the glue and 1/2 cup of water together in on bowl
  2. mix borax and 1 cup water together in the 2nd bowl until borax is completely dissolved
  3. slowly pour the glue/water mix into the borax and stir
  4. when thickened add googly eyes knead with hands.
  5. pour out excess liquid.

Storage:

Store in plastic bag in the refrigerator to keep from molding.

Our experience:

 I did not use Elmer glue, I used the 2 for $1 glue form the dollar tree so i knew it wasn't going to be as firm or thick but i messed this one up a bit. I did not let the borax dissolve completely. I was mixing and stirring the last ingredients together but it wasn't firming up enough. Puzzled i looked into the bottom of my measuring cup and saw the problem, a good part of the borax was stuck at the bottom of the cup. I was just trying to hurry up because i could tell by the look on Havens face he thought the whole process was taking too long.
I decided that it was good enough for sensory play and had him put in the googly eyes. When he started fling slime all over the kitchen I moved the party outside. He didn't like the goo on his hands so i gave him a big spoon and he was happy with that. He enjoyed putting things inside the goo, so he started adding his own Halloween decor to the goo...rocks. When clean up time came he used that as an opportunity to give his hot wheels a car wash. All in all it was a fun disaster. i think i might try to get it right another time. I'd say it's worth a try.


 Also wanted to mention i know the photo quality isn't that great right now and I'm sorry for that but i cracked my lens. Bear with me until i can get a new one thank you.
  

October 7, 2014

Bingo Marker Art Activity


Super fun, super easy.  All you need are bingo markers and paper. I bought our bingo markers at the Dollar Tree, so that makes this activity super cheap also. Bonus.


We let free and got pretty in to our art making session and pretty messy. I'm a spotted multicolored Mama right now. We where doting pretty hard to make a splatting effect and we achieved that effect on paper as well as all over ourselves . So I'd say wear old clothes and do this activity out doors.


I think this activity is a keeper as long as you have some clean up time available, which is the case with most crafty activities, so no big deal.


October 2, 2014

Simple Things I Did to Make a Week Day Birthday Special.

Haydynns birthday landed right in the middle of the week this year, and although we will be celebrating this weekend with a party and all the family, her BIRTH DAY is still special. So this is what we did for her to make her day special as she is. 

When we woke up for school I traded my coffee time to make her look extra special. So worth it she was beaming from ear to ear.
I made little goodie bags, with bulk candy. Easy enough.... 


Well kinda. Haven kept swiping the candies.


Then finally when he gave up our little kitty Dexter decided thought it be fun to try to steal whole bags.


This i where normally i would bag them up and place them in her back to deliver to her teacher as soon as she got to school, But we got lucky this year and grandma bought cupcakes and we got to visit her class room after lunch. It was so nice.


Then later at dinner time i made her the exact dinner she requested the night before, no questions asked. It was very yummy.


And of course in true birthday fashion there was cake. It was homemade and very homemade looking but that didn't matter because she loved it. We sung and then enjoyed this delicious cake. It was a absolute great day. She felt as special as can be which is very important to a little girl with two little brothers so close in age.


September 30, 2014

Homemade paint for the titty bittys

This is our experience with this recipe for homemade paint.


Like it states in the blog name I'm pretty graceless. I threw this together with  Eriksen crying and Haven going crazy behind me. It came out a bit clumpy but it still worked for its purpose. I got the recipe from  http://kidsactivitiesblog.com/


You need :

5 cups cold water
2 cups flour
1\4 cup salt
food color

instructions:


1. put water and flour in sauce pan, heat low (I think this is were I might have messed up) sir until smooth.
2. stir in salt.
3 Let Cool
4. Pour  some in separate cups and add color
5. have fun.
It makes a lot there is so much more left in the pot.